This project aims to upgrade the popular DIY Smart Blinds v1.1 with a Nema stepper motor in order to increase the torque for moving roller blinds. For this project, my biggest concern is the size of the Nema motors. The aim of this version is to keep the form factor of the device as small as possible, give it as much pulling power as possible and allow for a standard 12v power supply. I have estimated that the total cost of this project is between $40 AUD – $60 AUD depending on where you source your components. Below is a short teaser of the project.
The Motor
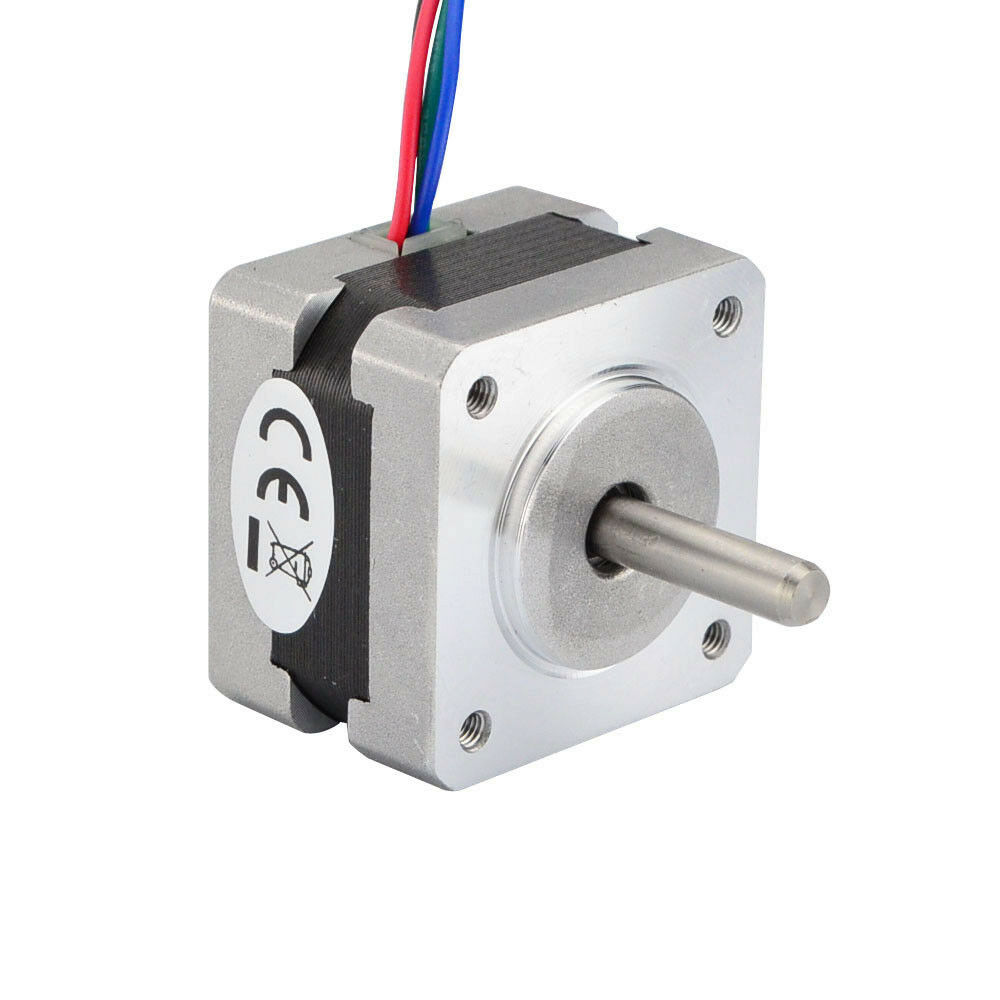
For this project I will use the NEMA 14 and NEMA 17 Stepper motor. The NEMA 14 motor is a smaller alternative to the NEMA 17 measuring at 35mm x 35mm x 26mm. They are both 12v. NEMA 14 has roughly the torque of 14N.cm (20oz.in.) and NEMA 17 44N.cm. compared to the 28BYJ-48 motor used in the previous design which is approx. 2.9N.cm. This should make this devices much stronger (based on estimated values from manufacturers specs, results may vary). The NEMA 17 version may even be able to to pull a small roller-blind. The NEMA motor come in various lengths (depths). For this design I chose to use lengths as follows NEMA 14, 29mm(max) and NEMA 17, 40mm(max).
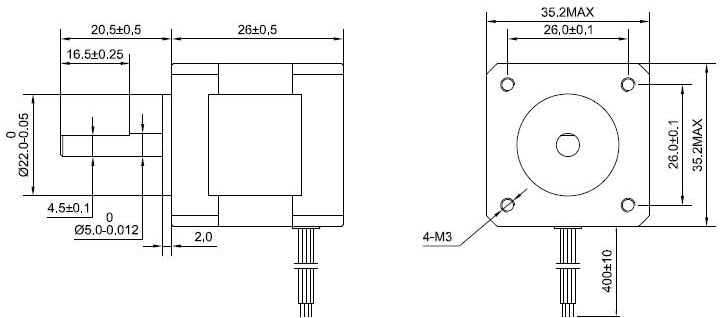
NEAM 14 Dimensions 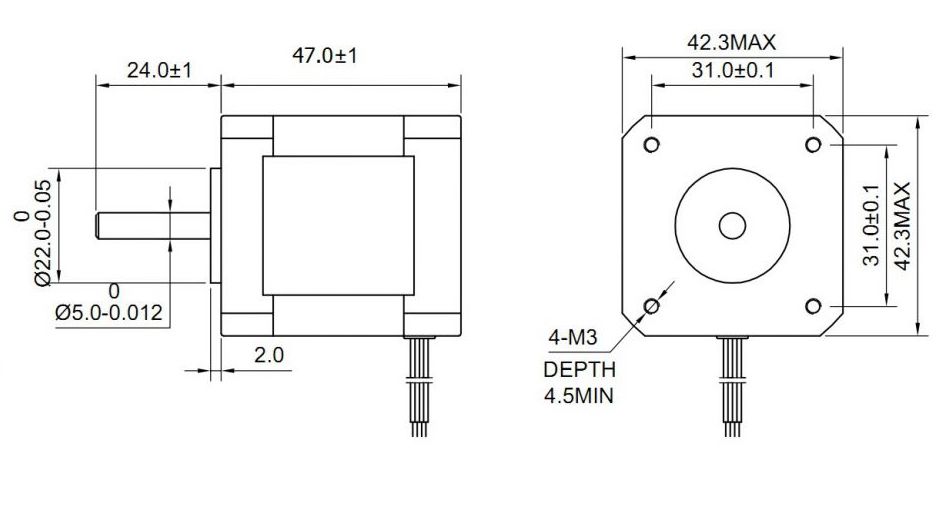
NEMA 17 Dimensions
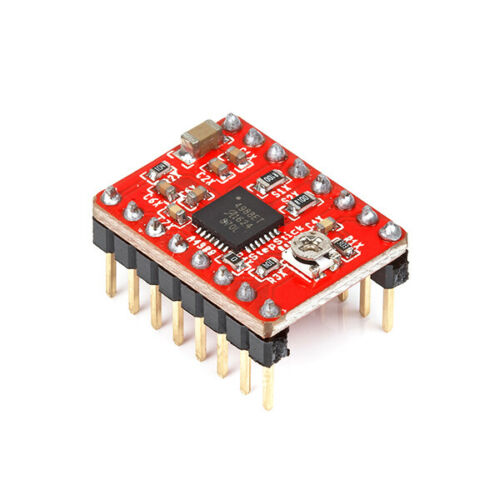
The Driver
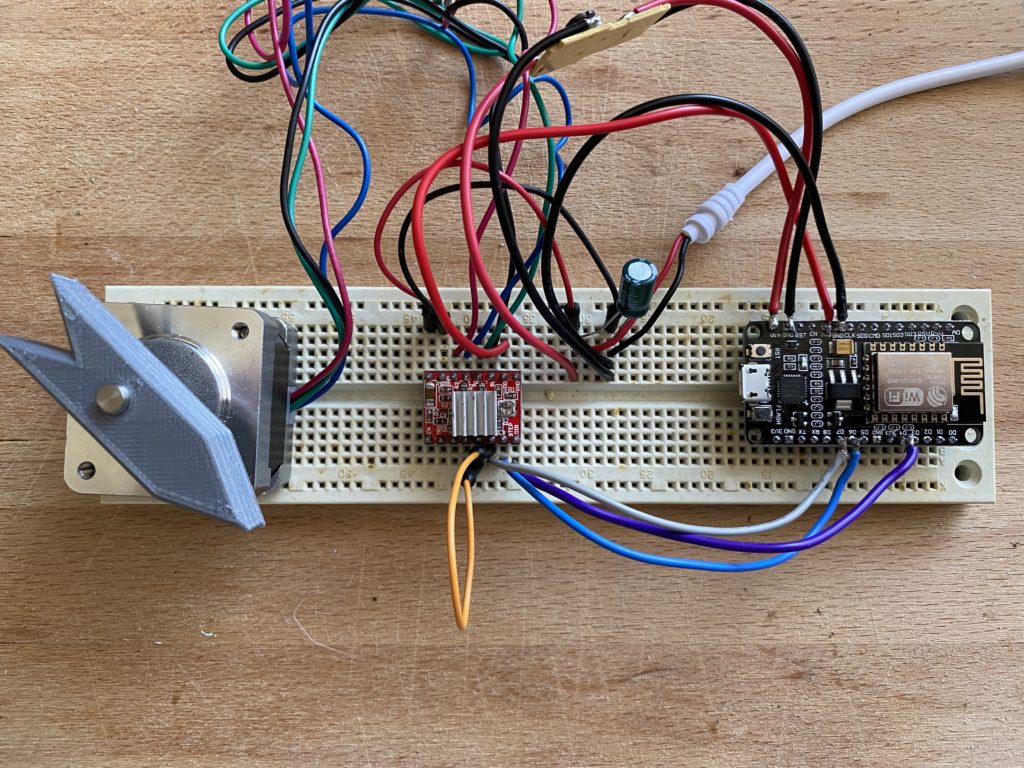
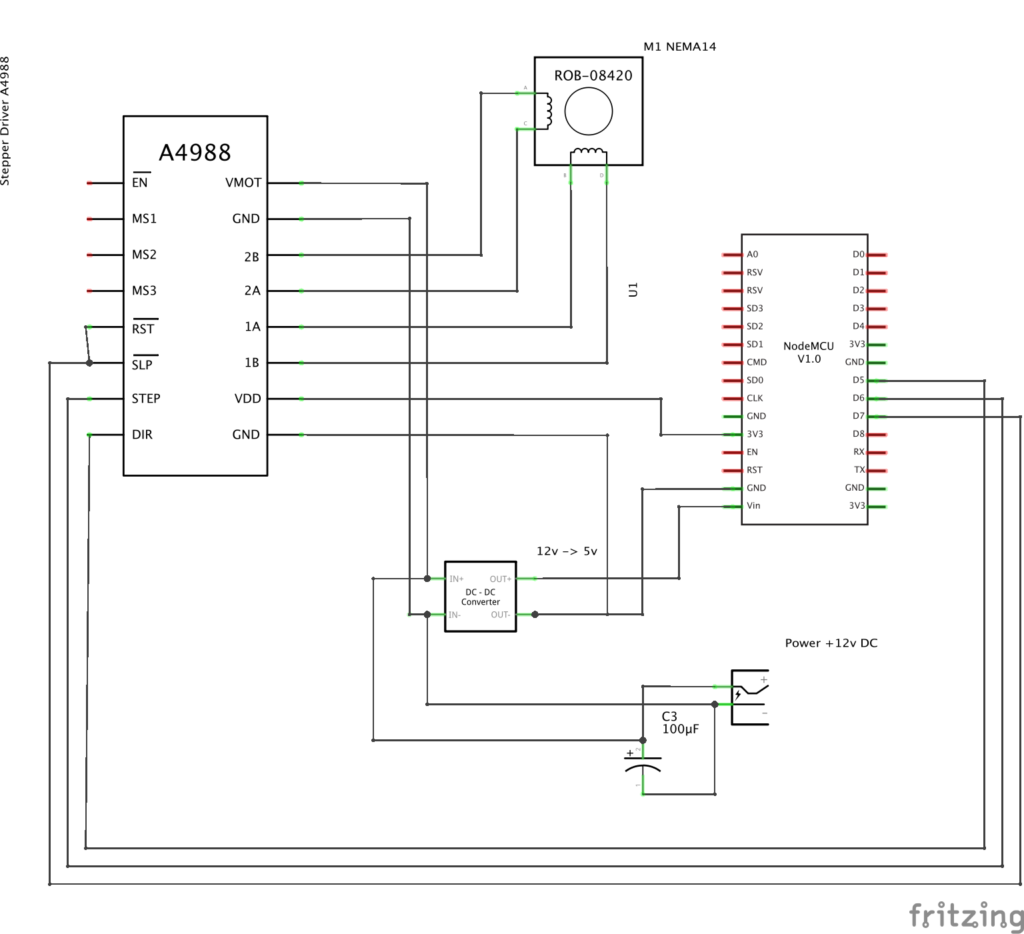
To control the stepper motor, the design should use the A4988 motor driver. It is a noisy driver but it is inexpensive and capable of controlling these motors.
The Processor
I have used the Node MCU ESP8266 processor for many of my projects. It can be easily programmed using the Arduino IDE, its small and it has WiFi built in. Not to mention great community support. Hence for this project I will use it again.
The second option is the NodeMCU ESP8266 WeMos D1. This processor has a smaller form factor and could also be a good choice.
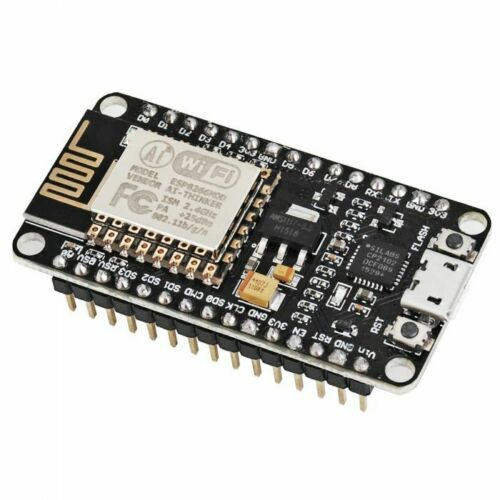
NodeMCU ESP8266 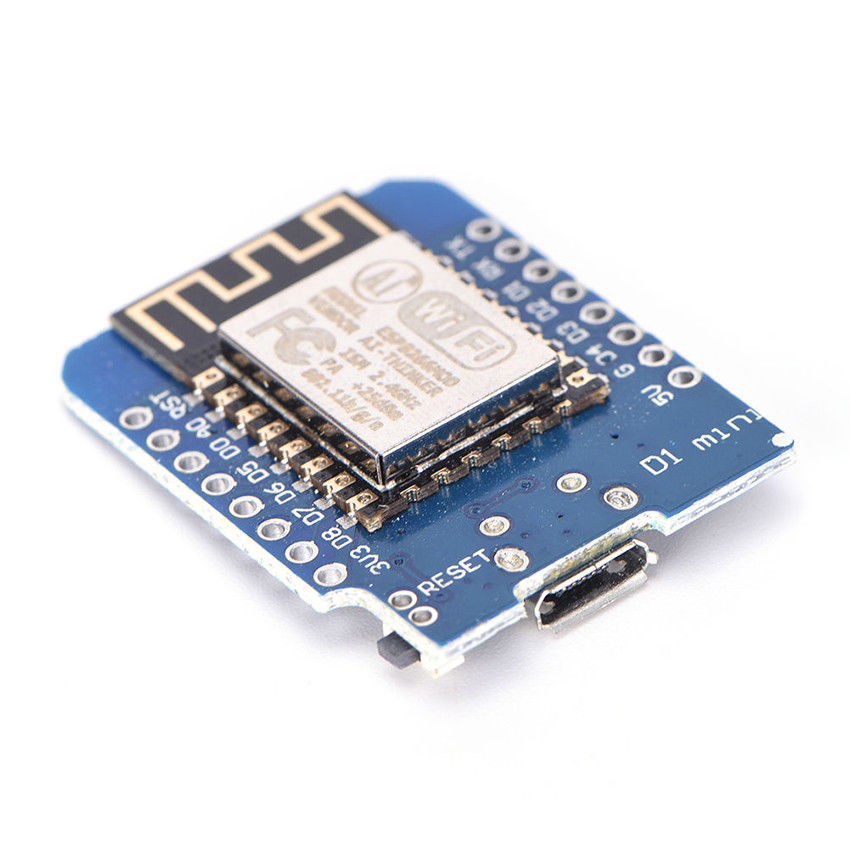
NodeMCU Wemos D1
Considerations
- NEMA 14 or NEMA 17 stepper motors get hot when they run, a 3D printed PLA enclosure may not be able to sustain the heat buildup during operation. Testing shows that typical operation only lasts a 5-10sec then pause. Hopefully this should not raise the temperature too high.
- For this design I have chose the NEMA 14 motor dues to its size but I am also going to make a NEMA 17 variant to get an even more powerful device for those that need it.
- NodeMCU is a better choice because it has VCC in pins. The WeMos D1 needs to be powered through the micro USB port.
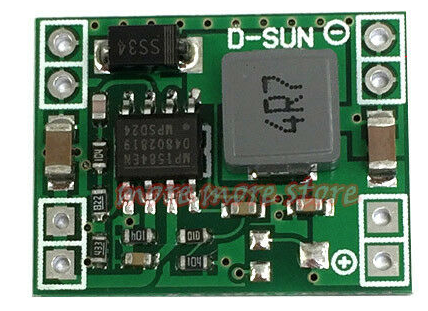
- To power the circuit from one 12v power supply, a 12v to 5v Buck converter will be required. There are various but converters on the market. Make sure you choose one that can handle a current of 1-2A as a stepper motor can be drain quite a bit of current per phase.
Schematic Diagram
What you will need
- nodeMCU Board
- A4988 Motor Driver
- 12v to 5v Buck Converter
- NEMA14 or NEMA17 Stepper Motor
- 100uF 16v Capacitor on the input voltage
- 5.5mm x 2.5mm DC Power Port
- (8x) 2.5mm x 6mm Button Head Screws (for the lids)
- (2x) 2.5mm x 6mm Self Tapping Screws (for nodeMCU mounting)
- (4x) M3 x 6mm Countersunk Crews (for the motor mount)
- STL Files (link below)
- Software (links below)
Software
| Description | Link |
| Arduino Sketch (this may evolve over time) | GitHub link |
| Homebridge plugin / Homekit | GitHub link |
| Samsung SmartThings – device handler | GitHub link |
The Design Shape
What form factor should the DIY SmartBlinds v3 have?
- Rectangular Shape similar to v2 (54%, 13 Votes)
- L-Shape similar to v1 (46%, 11 Votes)
Total Voters: 24
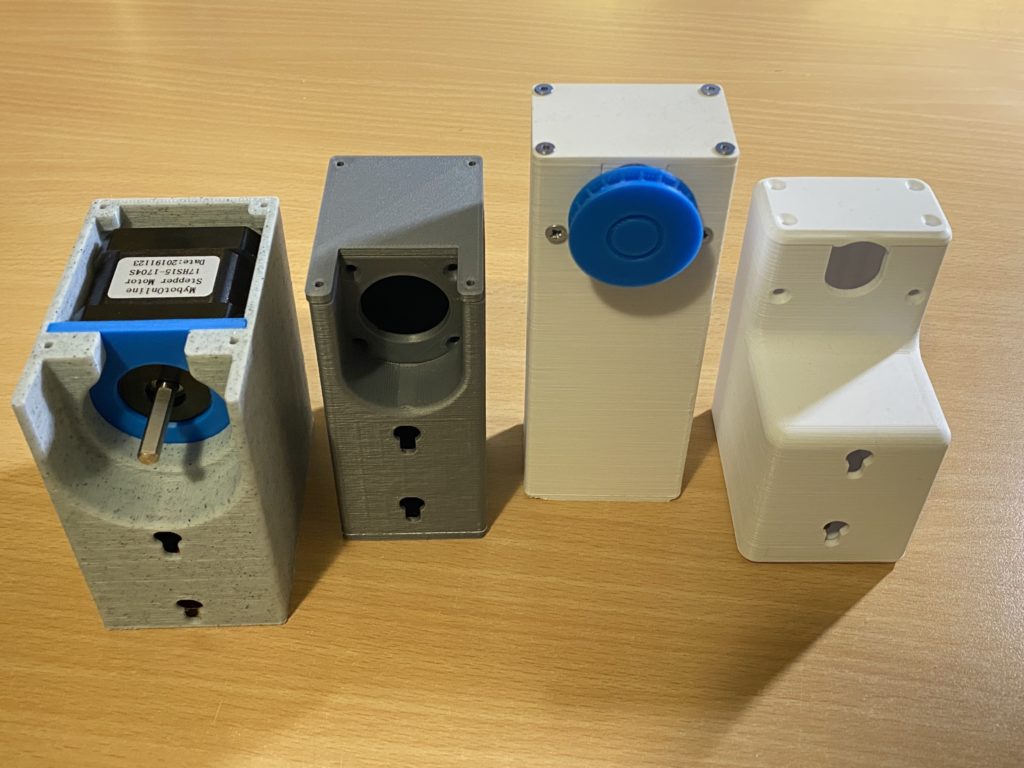
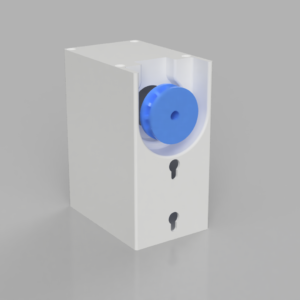
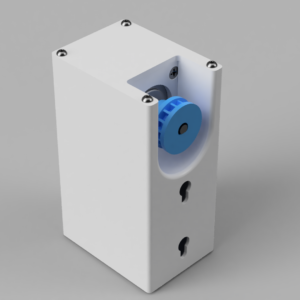
Thank you everyone that participated in the survey. As requested, the design is rectangular. I designed it with a chain guard all inclosed. Checkout the design renders and some first assembly photos below.
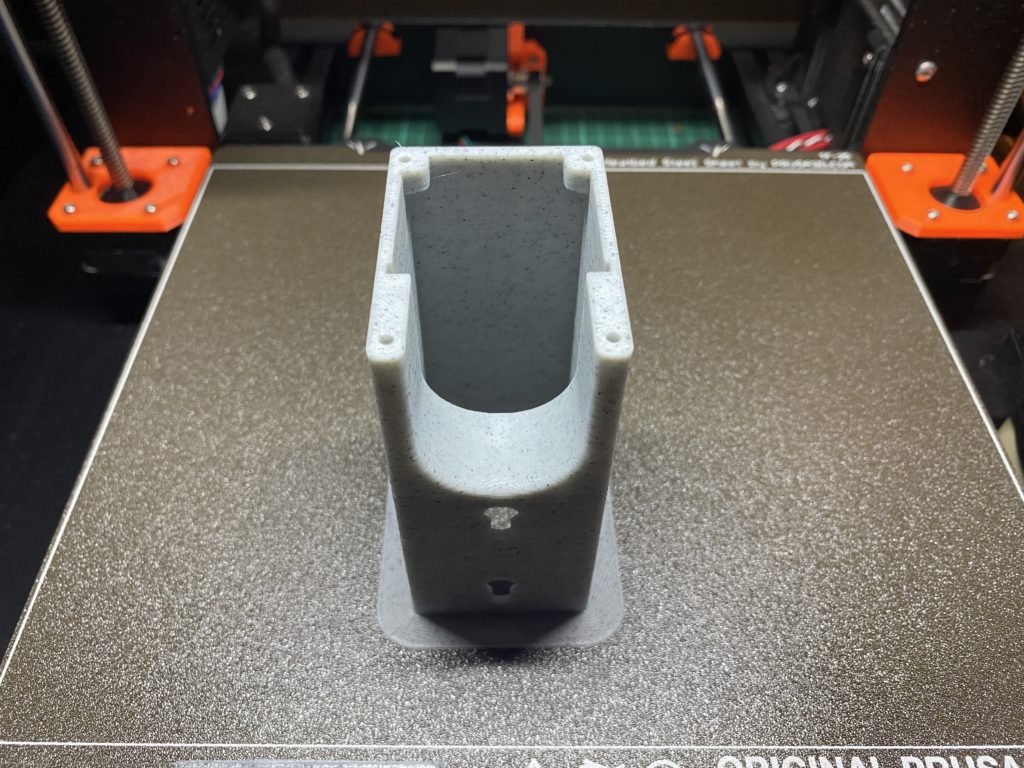
3D Printing
TIP: When printing the main body, print it with a brim. 8mm should be sufficient. Due to the walls on the main body being only 2.5mm thick, I found that when I printed it without the brim the model would get unstuck halfway through and the print was destroyed.


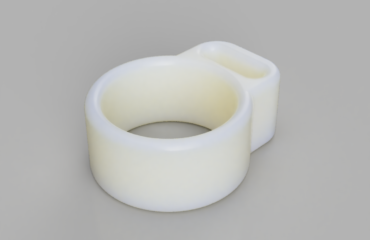
Assembly (NEMA14 & NEMA17)
Always prime all printed holes 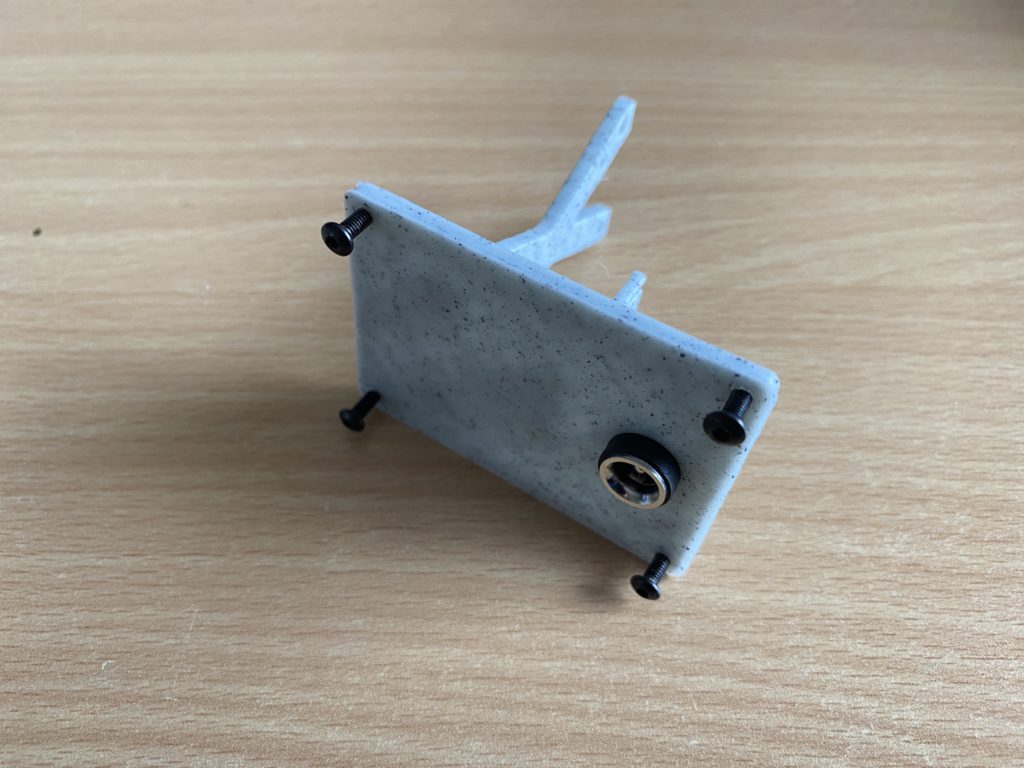
DV plug should just slide in 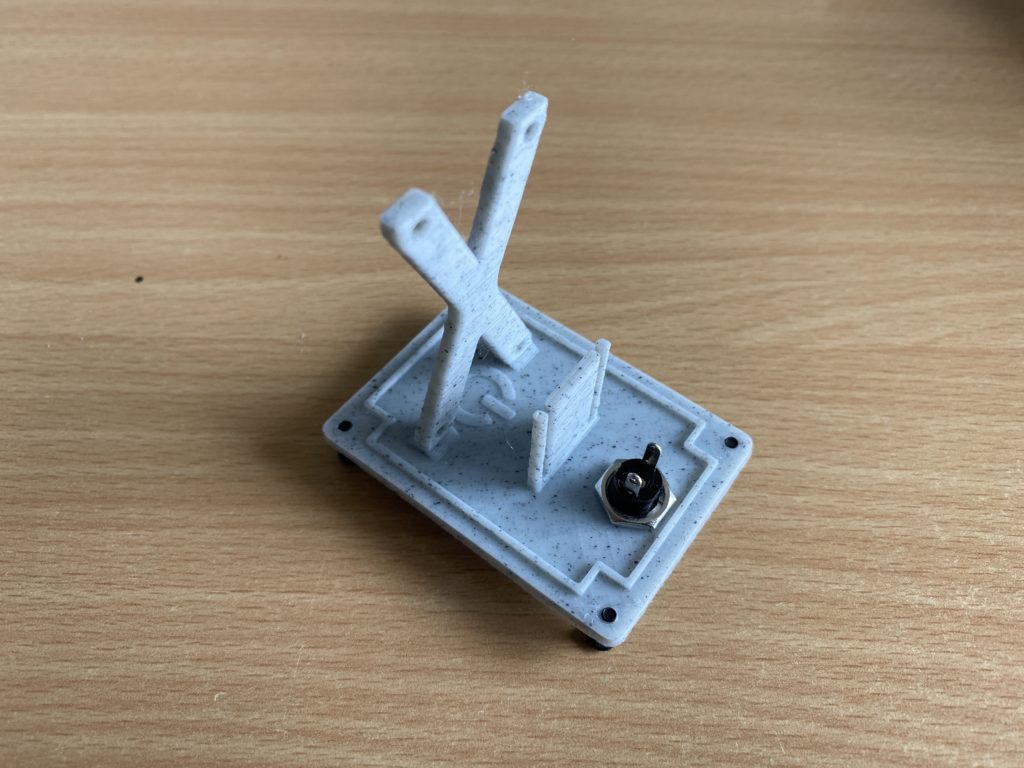
The DC plug screw has a sung fit 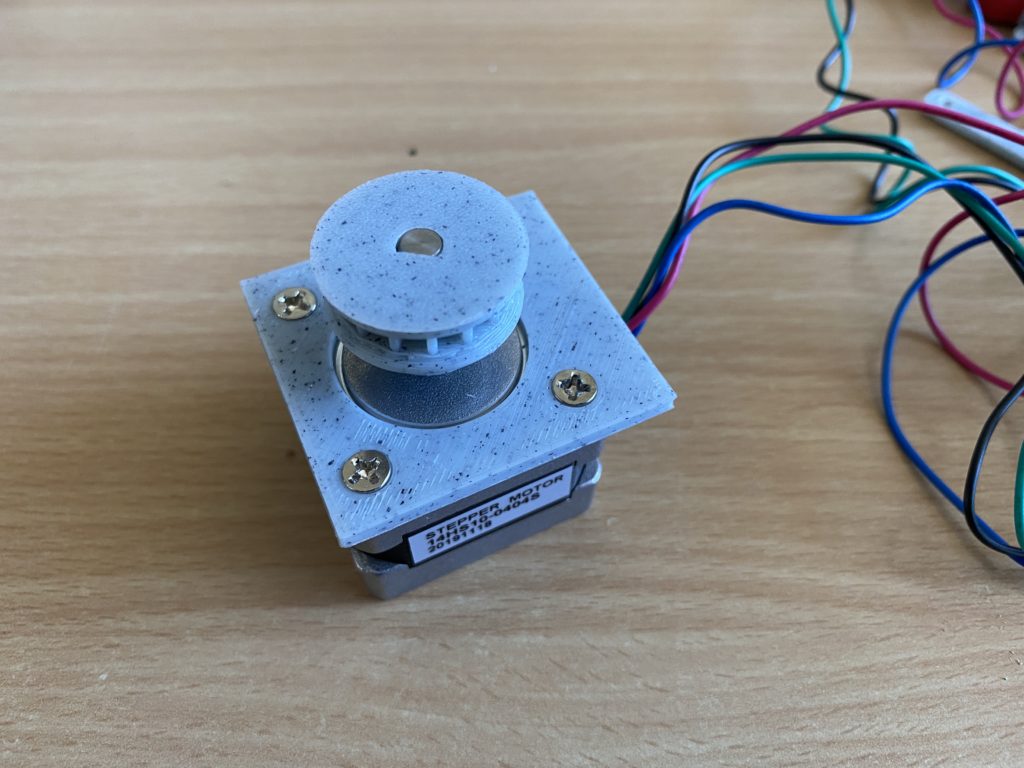
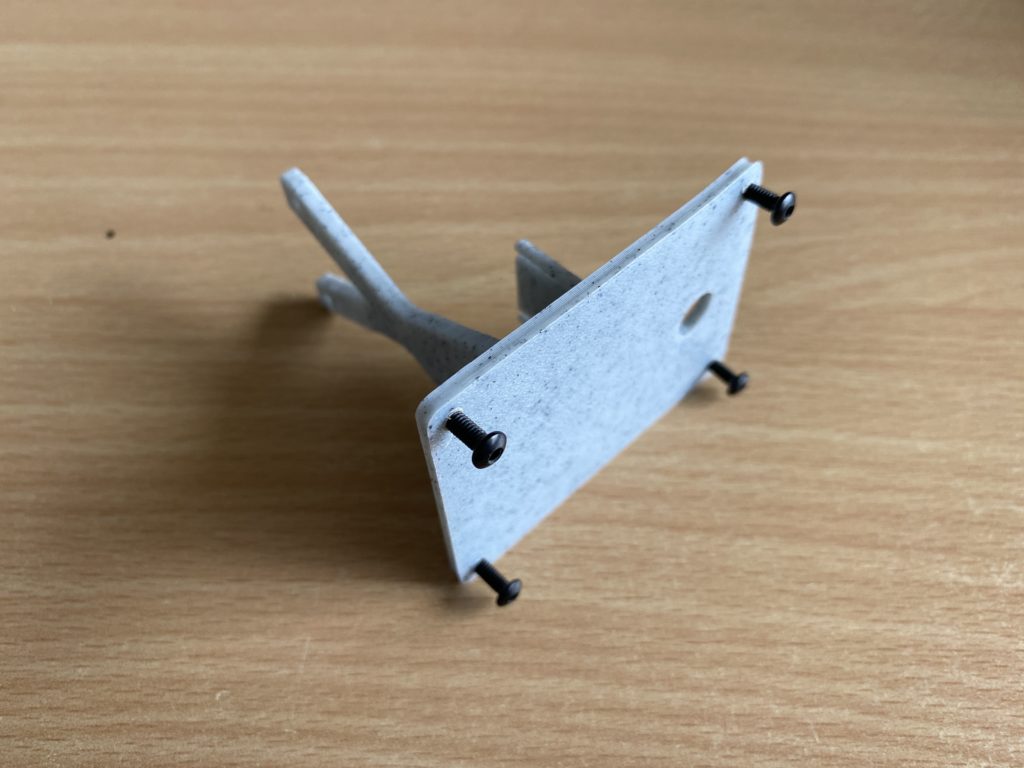
The motor is simple screwed on the motor mounting plate 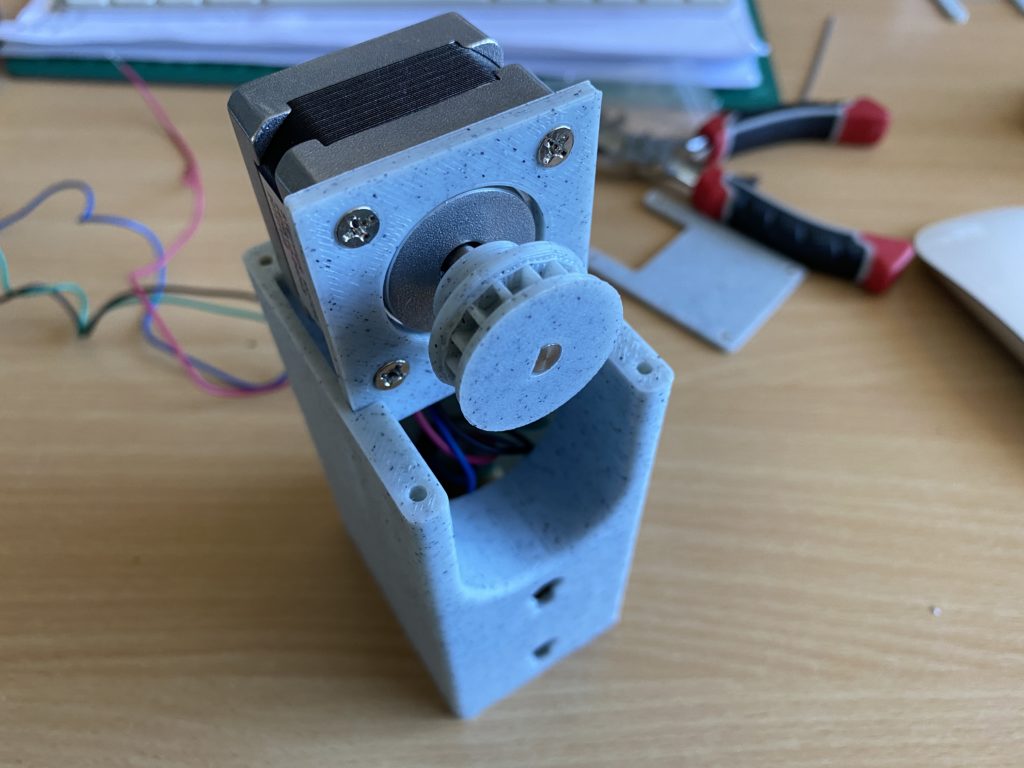
The mounting plate slides into the main body. Its a tight fit, might require some clearing 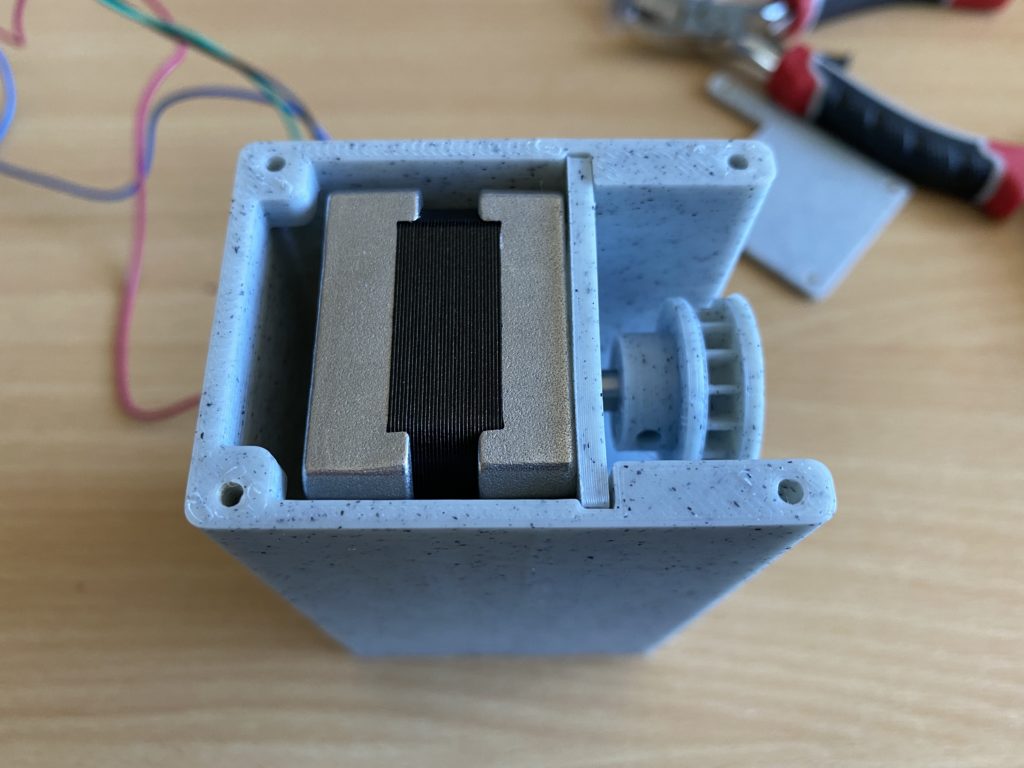
The motor as a snug fit 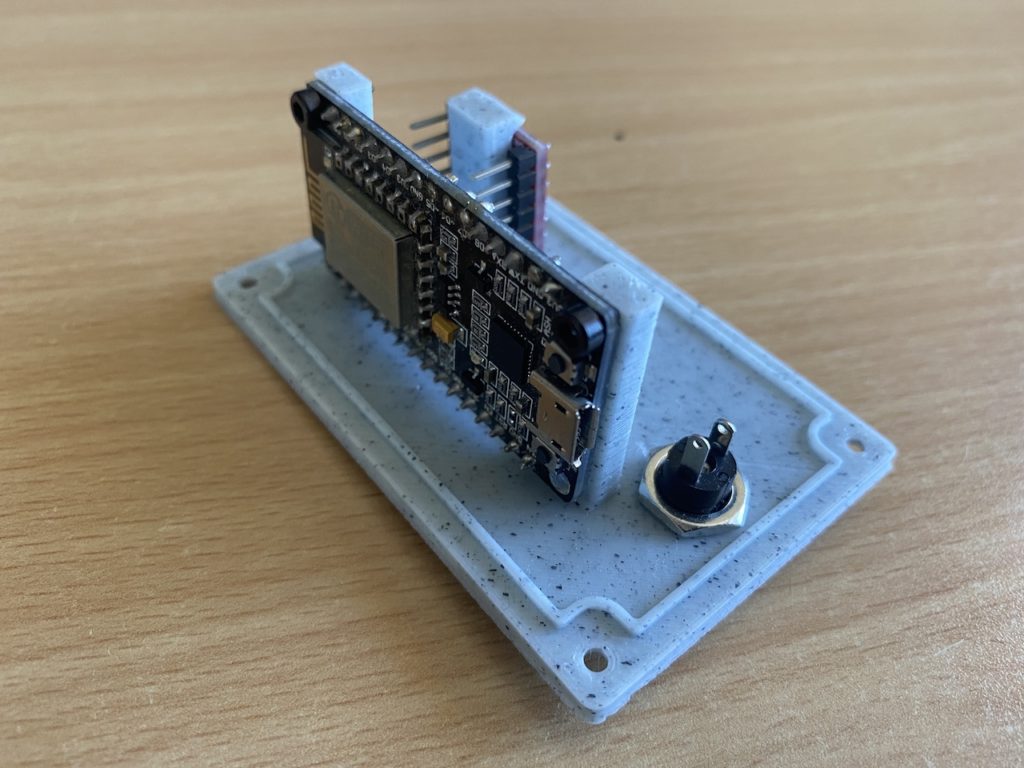
NEMA 17 Suggested NodeMCU mounting position 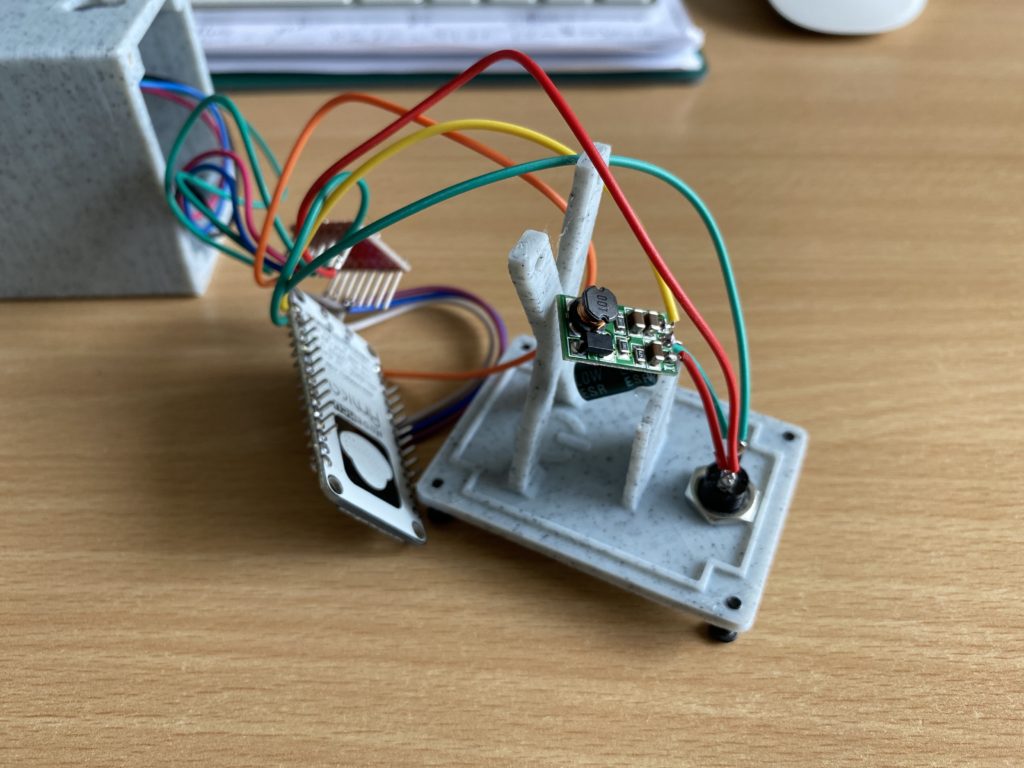
Remove the pins off the nodeMCU for an easier fit 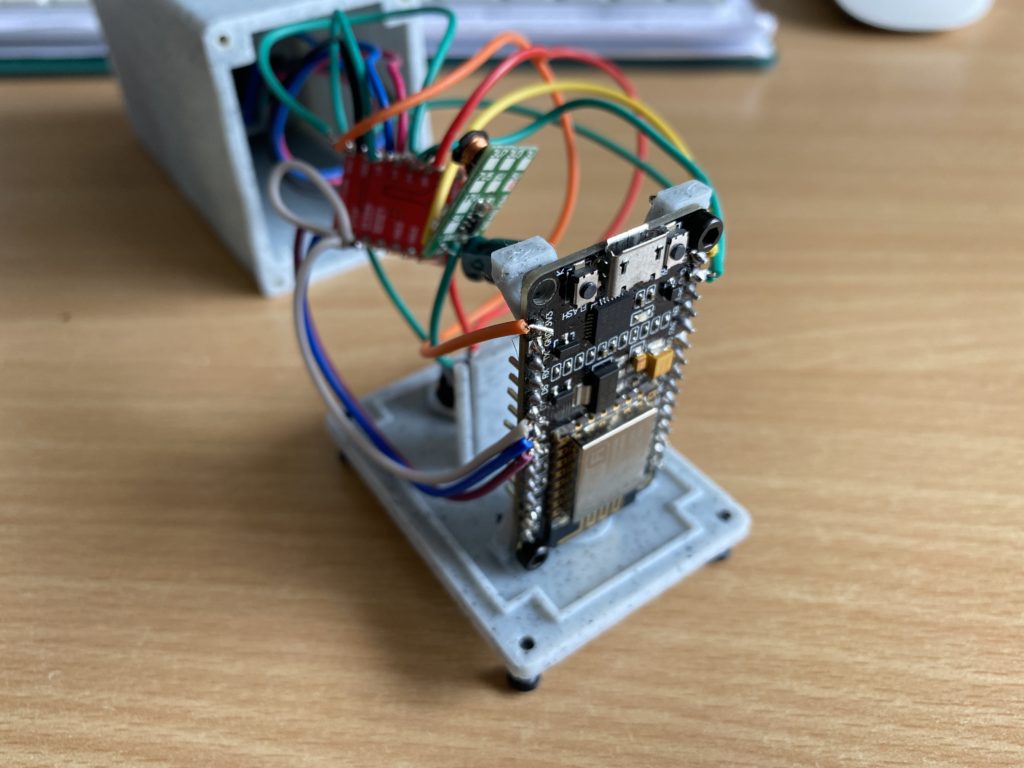
mount the nodeMCU with the USB pointing so that you have easier access when reprogramming 
The driver slides into its printed port. Cable management leaves much to be desired. 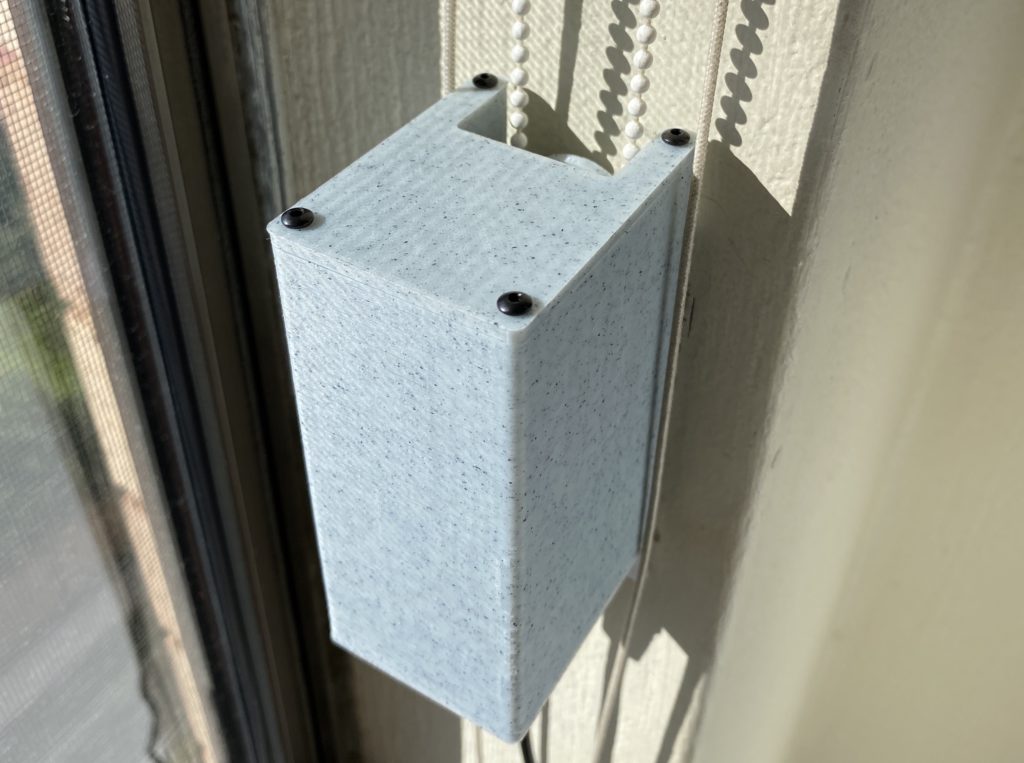
Complete project


Cool project, just wondering any thoughts on developing a version that drives the pipe like the one below
https://www.thingiverse.com/thing:2065722
Very cool project and thanks for your work on it. I’ve been having a fun time playing around with making my own.
If you’re still working on a version 5 or 4.1 can I suggest the adding of manual buttons on the body?
Sometimes you want to just get up and alter the blinds, don’t have a phone/tablet or can’t to speak to a voice assistant.
Sometimes a button is just better 🙂
Hi Everybody,
did someone make this project working on homeassistant?
Greetings
Hi!
Im just wondering wtf the 100uF 16v Capacitor does and why I need one?
I was able to easily order everything else from amazon, but that capacitor is $20 bucks in my country, please respond!
The screw holes are upside down, They should be placed so the weight of the device holds it fixed to the wall.
I was thinking the same … 🙂
Hey Peter. I got everything working great… except the intigration of Smartthings and Google Home control. I added the custom Device Handler and the blinds show up fine in my Smartthings app but using any of the buttons in the app doesnt do anything. Am I missing something here? I heard talk of a hub but I’m not entirely sure what that is.
Thank you.
But anyway… it’s the greatest project I actually get WORKING after a few little
software ‘changes’.
And Peter Chodyra, what was the meaning of that “#define hotPIN D8” ?
Further a BIG 10 for you mate !!
I have the same question John !
It’s used to sleep the motor when not in operation.